
Vue3——自定义封装上传图片样式
创始人
2025-05-29 06:55:26
自定义封装上传图片样式
一、首先需要新建一个自组建完善基础的结构,我这里起名为ImgUpload.vue
name 上传的文件字段名
show-file-list 是否显示已上传文件列表
accept 接受上传的文件类型(thumbnail-mode 模式下此参数无效)
multiple 是否支持多选文件
http-request 覆盖默认的 Xhr 行为,允许自行实现上传文件的请求
二、接下来自定义背景以及图标
![]()
判断如果存在路径则显示图片,否则显示默认背景
样式如下:
.cover-upload-btn {width: 150px;height: 150px;position: relative;border: 1px solid #DCDFE6;border-radius: 5%;padding: 5px;box-sizing: border-box;img{width: 100%;}i {position: absolute;top: 50%;left: 50%;font-size: 46px;transform: translate(-50%, -50%);color: #aaa;}
}
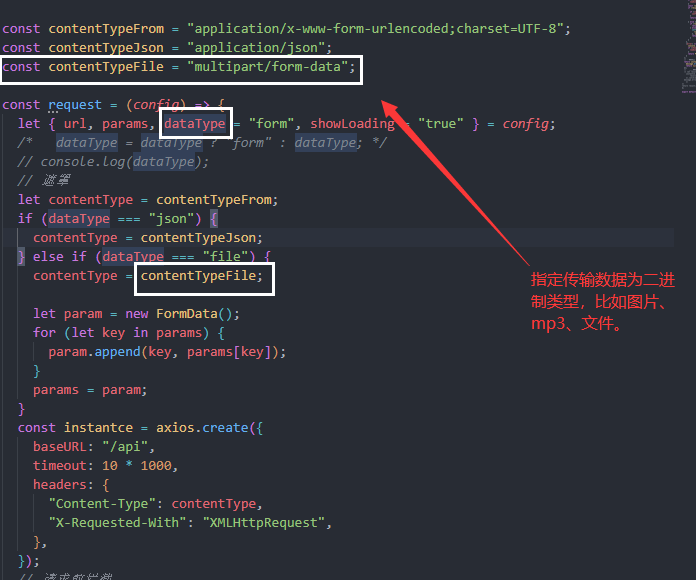
三、上传方法
const uploadImgage = async(file) => {console.log(file);// 请求接口中需要带url以及let result = await proxy.Request({url:api.uploadUrl,  // 上传路径dataType:'file', // 指定传输类型params:{file:file.file,   // 提交上传路径到指定位置type:0,          }})const fileName = result.data.fileNameemit('update:modelValue',fileName)
};
dataType可以参考这段封装请求的requset
前面配置的代码部分如下:
import { getCurrentInstance } from "vue";const {proxy} = getCurrentInstance()
// 通过props将路径传给父组件
const props = defineProps({modelValue:{type:String,default:null}
})
const api = {uploadUrl:'/img' //图片上传接口
}
然后注意一下这个位置
![]()
这里的globaInfo.imageUrl是在全局中进行调用,所以上方使用proxy来获取路径位置
main.js配置如下
import App from './App.vue'
const app = createApp(App);
app.config.globalProperties.globaInfo = {  // 添加可以在应用程序内的任何组件实例中访问的全局 property。属性名冲突时,组件的 property 将具有优先权。imageUrl:'/api/file/'  //放入图片的文件夹位置
};
import ImgUpload from '@/components/ImgUpload.vue'; //引入子组件
app.component('ImgUpload',ImgUpload) // 全局调用组件
最后在父组件中引入自组件即可
相关内容
热门资讯
百米炮仗花长廊盛放,橙红瀑布倾...
刷爆朋友圈、霸屏短视频,最近南宁人的春日快乐,被一条百米炮仗花长廊狠狠承包了。2月12日,暖阳洒向邕...
多所高校推出一分钱年夜饭,年味...
春节即将来临,年味愈加浓厚。对于选择留在校园过年的同学们来说,年夜饭成了一个热门话题。那么,留校过年...
【客家】不蒸甜粄不过年!客家人...
客家人有“不蒸甜粄不过年”的说法,在琳琅满目的年货里,甜粄是绝对的主角,更是亲戚拜年赠礼的首选。每逢...
马年开运指南!麦玲玲现身广州花...
“玲玲姐有什么能帮大家马年行大运的技巧,可以教给街坊们?” “你还记得若曦吗?”…… 2月12日,春...